
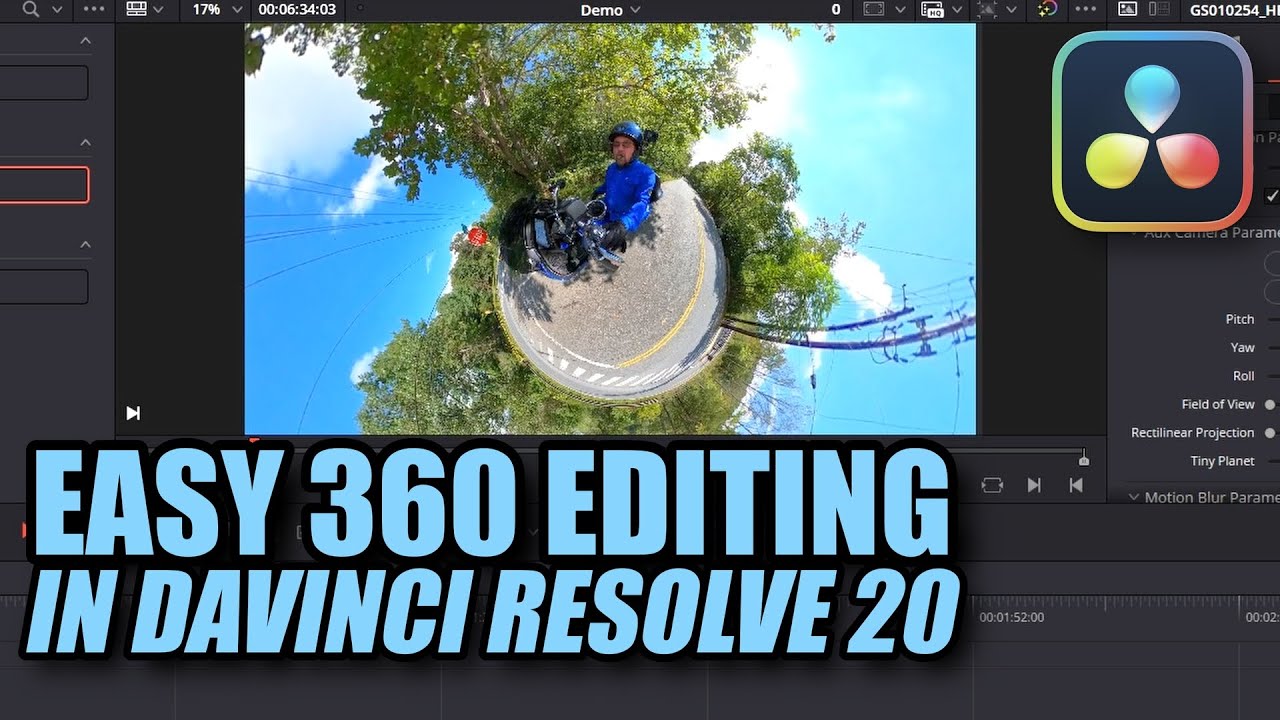
Reframing 360° videos allows you to create traditional, flat videos from immersive footage. Mastering how to reframe videos with 360° cameras unlocks an incredible new dimension in content creation, transforming sprawling spherical recordings into focused, cinematic masterpieces tailored for any platform. If you’ve ever felt overwhelmed by the sheer amount of data a 360° camera captures, or wondered how to distill that immersive experience into a compelling, traditional video, you’re in the right place. We’ll dive deep into the techniques and tools that empower you to take control of your virtual camera, telling precise stories from every angle you’ve captured.

Source: youtube.com
Understanding the Magic of 360° Cameras
At its core, a 360° camera is an amazing piece of tech that simultaneously records every direction around itself. Think of it as having eyes everywhere, capturing a complete spherical view of a scene. This means that whether you’re at a concert, hiking a scenic trail, or simply documenting a family gathering, you’re not just getting a single perspective – you’re getting the entire perspective. You might assume this footage is only for VR headsets, but that’s where the magic of reframing comes in. It’s the art of taking that vast, omnidirectional capture and strategically selecting specific “flat” video sequences from within it, essentially giving you the power to direct a virtual camera after the shoot.
Source: infinibandta.org
Why Reframing is a Game-Changer for Your Content
Reframing isn’t just a technical process; it’s a creative superpower that revolutionizes your workflow and output. First, it offers unparalleled cinematic control. Instead of being locked into a single angle decided on the fly, you can meticulously craft your shots in post-production, choosing the perfect pan, tilt, and zoom to highlight key moments. This means you can create multiple unique videos from a single 360° recording, saving you time and effort on location.
Secondly, it solves the challenge of platform compatibility. While 360° videos are fantastic, they’re not universally supported or consumed. By learning how to reframe videos with 360° cameras, you can produce standard aspect ratio videos (like 16:9 for YouTube or 9:16 for TikTok) that reach a much broader audience on traditional platforms. It also makes your storytelling incredibly flexible; you can lead the viewer’s eye, emphasize reactions, or reveal details that might otherwise be missed in a full 360° view.

Source: hilinelaw.com
The Essential Toolkit: What You Need to Get Started
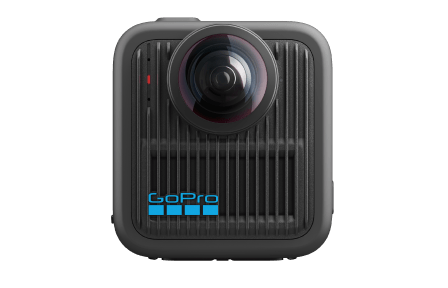
Before you dive headfirst into reframing, you’ll want to ensure you have the right gear and software. First, obviously, you need a 360° camera. Popular choices include the Insta360 series (like the X3 or One RS) and GoPro MAX, known for their excellent stabilization and user-friendly interfaces. Beyond the camera, a powerful computer is crucial. Reframing and editing 360° footage is resource-intensive, so a robust processor, ample RAM (16GB minimum, 32GB or more preferred), and a dedicated graphics card will make a world of difference in rendering times and overall smoothness.
For software, you’ll typically start with your camera’s native editing application (e.g., Insta360 Studio or GoPro Player) for initial stitching and basic adjustments. However, for serious creative control and advanced reframing, you’ll need professional video editing software. Adobe Premiere Pro, DaVinci Resolve, and Final Cut Pro all offer excellent plugins and workflows for handling 360° footage, allowing you to seamlessly integrate your reframed shots into larger projects. These tools are key to truly understanding how to reframe videos with 360° cameras effectively.
Source: insta360.com
Step-by-Step Guide to Reframing Your 360° Footage
Now for the exciting part – the hands-on process of transforming your raw 360° footage into dynamic, reframed videos.
Step 1: Ingesting Your Footage
Begin by transferring your 360° files from your camera to your computer. Most 360 cameras record two fisheye lens files that need to be “stitched” together to form the spherical panorama. Your camera’s native software (like Insta360 Studio or GoPro Player) is usually the best place to do this, as it handles the proprietary stitching algorithms perfectly. After stitching, you’ll have a single, equirectangular video file, which is essentially a flattened representation of your 360° world.
Step 2: Choosing Your Canvas and Aspect Ratio
Once stitched, import your equirectangular footage into your preferred video editor. The first decision is your output’s aspect ratio. Are you aiming for a cinematic 16:9 for YouTube, a vertical 9:16 for social media stories, or a square 1:1? Setting your sequence or project settings to match your desired output is crucial, as this defines the “window” through which your virtual camera will view the 360° sphere.
Step 3: Navigating the 360° Sphere
This is where you virtually “move” your camera. Most editing software with 360° support will have controls for pan (left/right rotation), tilt (up/down rotation), and field of view (zoom in/out). Imagine you’re holding a traditional camera within the 360° sphere and pointing it wherever you want. Play around with these controls to explore your footage and find compelling angles. This fundamental step is at the heart of how to reframe videos with 360° cameras.
Step 4: Setting Keyframes for Dynamic Motion
Static reframes are fine, but dynamic camera movements make your video truly engaging. This is achieved through keyframes. A keyframe marks a specific point in time where you set a particular pan, tilt, and zoom value. By setting multiple keyframes along your timeline, the software will smoothly transition the virtual camera position between them, creating fluid pans, tilts, and zooms. For example, you might start wide on a landscape, keyframe to zoom in on a specific person, then pan to follow their movement.
Step 5: Adding Creative Flair (Tiny Planet, Fisheye, etc.)
Reframing isn’t just about flat video; you can also leverage the 360° nature for unique visual effects. The “Tiny Planet” or “Little Planet” effect, where the entire 360° scene is warped into a small sphere, is incredibly popular. You can also experiment with extreme fisheye looks or even a “rabbit hole” effect where the world seems to stretch infinitely. These effects often involve adjusting the field of view to extreme settings and manipulating the pitch and yaw.
Step 6: Exporting Your Masterpiece
Once you’re satisfied with your reframing, it’s time to export. Choose your desired resolution (e.g., 1080p, 4K), frame rate, and compression settings. Remember that reframing 360° footage to a flat video often means that a 5.7K 360° original might yield a 1080p or 2.7K reframed output with good quality, depending on how much you zoom in. Always review your export to ensure colors, motion, and audio are exactly as intended.
Source: infinibandta.org
Advanced Reframing Techniques and Creative Tips
Once you’re comfortable with the basics of how to reframe videos with 360° cameras, you can start exploring more advanced techniques to truly elevate your content.
Focus on the Story, Not Just the Shot
My biggest piece of advice from years of working with 360° cameras is this: always remember the story you’re trying to tell. Don’t just wildly pan around because you can. Every virtual camera movement should serve the narrative, guiding your viewer’s attention to what matters most. Think about traditional filmmaking principles – establishing shots, close-ups, following action – and apply them creatively within your 360° sphere.
Mastering the “Dolly Zoom” Effect
The “dolly zoom” (or “Vertigo effect”) is a classic cinematic technique that can be stunningly recreated in 360° reframing. It involves simultaneously zooming in on a subject while moving the virtual camera backward (or zooming out while moving forward), creating a disorienting yet captivating visual. You achieve this by carefully coordinating keyframes for both the field of view (zoom) and the camera’s position.
Leveraging “Invisible Selfie Stick” for Clean Shots
One of the coolest features of many 360° cameras is their ability to make the selfie stick disappear from the footage. This means you can get incredible drone-like shots or third-person perspectives without seeing the camera rig itself. When reframing, always keep the “invisible selfie stick” in mind to position your virtual camera in ways that maximize this unique capability, giving your footage a professional, floating feel.
Utilizing FlowState Stabilization (or equivalent)
Modern 360° cameras boast incredible in-camera stabilization, often branded as “FlowState” or “HyperSmooth.” This is a lifesaver, as shaky 360° footage can lead to motion sickness in reframed videos. Ensure this stabilization is applied (often automatically by the camera’s software) before you begin reframing. Smooth footage provides a much better foundation for your virtual camera movements and enhances the viewer experience.
Experimenting with Speed Ramps and Time-Lapses
Don’t limit yourself to real-time reframing. You can add dramatic impact by incorporating speed ramps (gradually slowing down or speeding up sections of your video) or by creating dynamic time-lapses from your 360° footage. Imagine a sunset time-lapse where you reframe the virtual camera to follow the sun’s descent across the sky, or a fast-paced action sequence with a sudden slow-motion reveal.

Source: gimbal-guru.com
Common Pitfalls to Avoid When Reframing
While reframing 360° videos offers immense creative freedom, there are a few common traps that newcomers often fall into. The biggest one is causing motion sickness. If you pan, tilt, or zoom too rapidly or erratically, your viewers might feel queasy. Aim for smooth, deliberate camera movements. Another pitfall is poor resolution. If your original 360° footage isn’t high enough resolution, or if you zoom in too much on a specific area, your reframed video can look pixelated and unprofessional.
Bad stitching can also ruin your output. If the original 360° camera hasn’t seamlessly merged the two lens captures, you’ll see a noticeable line or distortion in your equirectangular file, which will be visible in your reframed video. Always check your stitched footage thoroughly. Lastly, don’t over-reframe. It’s tempting to move the virtual camera everywhere, but sometimes a simpler, more focused shot is more effective. Less is often more when learning how to reframe videos with 360° cameras.

Source: infinibandta.org
My Personal Journey: Lessons Learned from Reframing Adventures
When I first got my hands on a 360° camera, I was like a kid in a candy store, recording absolutely everything. I quickly realized that simply uploading raw 360° footage didn’t resonate with my audience as much as I hoped. That’s when I dove headfirst into understanding how to reframe videos with 360° cameras. My early attempts were a bit chaotic, often resulting in dizzying pans and zooms that would make anyone feel seasick. I learned pretty quickly that just because you can move the camera anywhere doesn’t mean you should.
One crucial lesson came when I was editing footage from a mountain biking trip. I had captured an amazing downhill run, but my initial reframing was all over the place, jumping from the rider’s front wheel to a distant mountain view then back to the rider’s face. It was jarring. I scrapped it and restarted, focusing on the rider’s line and only panning slightly to anticipate turns, then adding a subtle zoom for key moments. The result was a far more engaging and watchable video. I also learned the hard way about file management – those 360° files are massive! Investing in fast external SSDs became non-negotiable. Trust me, smooth motion and organized files are your best friends in this game.

Source: robertscamera.com
Frequently Asked Questions of how to reframe videos with 360° cameras
What is 360 reframing?
360 reframing is the process of taking immersive spherical footage captured by a 360° camera and extracting traditional, flat video clips from it. It allows you to virtually “point” a camera within your captured 360° world during post-production.
Do I need special software to reframe 360 videos?
Yes, you need video editing software that supports 360° footage and reframing capabilities, such as Adobe Premiere Pro, DaVinci Resolve, Final Cut Pro, or the native editing apps provided by camera manufacturers like Insta360 Studio or GoPro Player.
Can I reframe a 360 video after I’ve already edited it as 360?
Typically, reframing is done before applying specific 360-only effects or exporting the full spherical video. You essentially create a new, flat video from the original 360° source, so it’s usually the first major post-production step for traditional video output.
What’s the best aspect ratio for reframed 360 videos?
The “best” aspect ratio depends on your target platform. 16:9 is ideal for YouTube and TV screens, 9:16 is perfect for vertical platforms like TikTok or Instagram Stories, and 1:1 works well for general social media feeds.
How can I avoid motion sickness in my reframed videos?
To avoid motion sickness, aim for slow, smooth, and deliberate virtual camera movements. Avoid rapid pans, sudden zooms, or constant, jerky adjustments. Let your movements guide the viewer’s eye naturally, and prioritize stable original footage.
Conclusion
The ability to reframe videos with 360° cameras is an incredibly powerful skill that transforms how you capture and share stories. It allows you to transcend the limitations of traditional video, granting you the creative freedom to direct your virtual camera long after the moment has passed. By understanding the tools, mastering the techniques of keyframing, and applying a discerning eye to your storytelling, you can unlock a universe of cinematic possibilities from your immersive footage. Don’t be afraid to experiment, learn from every project, and continuously refine your approach. The world is your oyster, and now you have the power to show it from every angle, exactly as you envision it. Start exploring your 360° archives today and unleash the reframing magic!