We’ve all been there. You take amazing shots on your camera, but they’re stuck there. You want to share them on your phone right away. It feels like a big hassle, but it doesn’t have to be.
I’ve tested every method you can think of. Some work great, and some are more trouble than they’re worth. The good news is you probably have what you need already.
This guide will walk you through each option. You’ll find the easiest way for your gear. Let’s get those photos off your camera and onto your phone where you can use them.
Why You Need to Transfer Photos from Camera to Phone
Your camera takes better pictures than your phone. That’s just a fact. But your phone is where you share them with friends and family. It’s where you edit them with cool apps.
Keeping photos only on your camera is a risk. Memory cards can fail. You could lose that tiny card. Moving them to your phone gives you a backup copy right away.
Social media lives on your phone. Instagram, Facebook, and messaging apps are all there. You want to post your best shots while they’re still fresh and exciting.
Phone editing apps are powerful and fun. You can tweak colors, crop, and add filters in seconds. But you need the photo on your device first to start playing with it.
Learning how to transfer photos from camera to phone solves this. It bridges the gap between your pro shots and your social life. It turns your camera into a powerful creative tool for sharing.
Method 1: Use a USB Cable (The Direct Way)
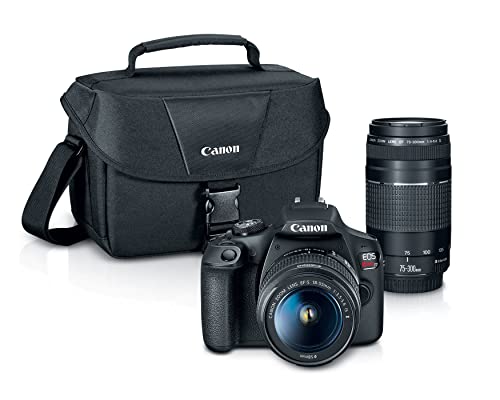
This is the most reliable method I use. Almost every camera comes with a USB cable in the box. You plug one end into your camera and the other into your phone.
You might need a small adapter. Newer phones often only have USB-C ports. Your camera cable might have a standard USB end. A cheap adapter from any electronics store fixes this.
Turn your camera on after connecting it. Sometimes you need to set the camera to a special mode. Look for “PC” or “Mass Storage” in your camera’s menu settings.
Your phone should recognize the camera as a storage device. You can then browse the folders like any other file. Find your photos in the “DCIM” folder, which is standard for cameras.
Select the pictures you want and copy them over. The USA.gov website has tips on managing digital files. Keeping them organized from the start saves you headaches later.
This method is great for moving lots of photos at once. It’s also fast because it’s a direct wired connection. The cable doesn’t cost much if you lost your original one.
Learning how to transfer photos from camera to phone with a cable is step one. It works when you have no internet. It’s my go-to method for its simplicity and speed.
Method 2: Use a Memory Card Reader (The Fast Way)
If your camera uses a removable SD card, this is a winner. You take the card out of your camera. Then you plug it into a reader that connects to your phone.
You can buy card readers made for phones. They have a lightning connector for iPhones or USB-C for Android. Some even plug directly into your phone’s port without a cable.
This method is often faster than a direct cable. The reader is designed for quick data transfer. It bypasses your camera’s slower internal processing.
It’s also easier on your camera battery. You don’t need to turn the camera on. You just pop the card out and into the reader, which gets its power from your phone.
You can find these readers online or at camera stores. They are small and easy to carry in your bag. I keep one in my camera case at all times for quick transfers.
Once connected, your phone sees the card as external storage. You can import all your photos or just select a few. It gives you full control over the file transfer process.
This is a top method for how to transfer photos from camera to phone quickly. It’s perfect for photographers on the move. You can edit and share shots minutes after taking them.
Method 3: Use Wi-Fi or Bluetooth (The Wireless Way)
Many newer cameras have built-in Wi-Fi or Bluetooth. This lets you send photos to your phone without any cables at all. You just need to pair the devices first.
Check your camera’s manual for wireless features. There’s usually a button or menu option to turn it on. You might need to download a specific app from your camera’s brand.
Open the app on your phone after installing it. It will guide you through connecting to your camera’s Wi-Fi signal. The connection is just between your two devices.
Once connected, you can view thumbnails of your photos in the app. Select the ones you want to transfer. Then tap download or import to save them to your phone’s gallery.
Wireless transfer is convenient when you’re out and about. You don’t need to carry extra cables or readers. But it’s usually slower than a wired connection for many files.
It’s great for sending a few highlight shots right away. You can leave the rest on the camera to transfer later. The FCC provides info on wireless technology standards if you’re curious how it works.
Learning how to transfer photos from camera to phone wirelessly is a modern skill. It feels like magic the first time you do it. Just be patient, as the speed depends on your signal strength.
Method 4: Use Cloud Services (The Automatic Way)
This method uses the internet as a middleman. You upload photos from your camera to a cloud service first. Then you download them from the cloud to your phone.
Some cameras can upload directly to services like Dropbox or Google Photos. You need to set up the account info in your camera’s menu. It requires a Wi-Fi connection for the camera.
Another way is to use a smart memory card. These special cards have their own Wi-Fi. They can send photos to the cloud as soon as you take them, without camera settings.
Once your photos are in the cloud, they sync to your phone app. Open Google Photos or Dropbox on your phone, and your pictures are there. You can then save them to your local storage.
This method is good for backing up and transferring at the same time. Your photos exist in two places – the cloud and your phone. It adds a layer of safety against losing them.
The Federal Trade Commission advises checking privacy settings on cloud services. Make sure you know who can see your photos when you upload them.
Figuring out how to transfer photos from camera to phone via the cloud is handy for travel. You can free up camera space while keeping access to all your shots on your phone.
Step-by-Step Guide for Cable Transfer
Let’s break down the cable method into simple steps. First, find the USB cable that came with your camera. If you lost it, any cable with the right ends will work.
Connect the small end to your camera’s port. It’s usually a micro-USB or USB-C port. Then connect the standard USB end to your phone, using an adapter if needed.
Turn your camera on. Some cameras need to be in a special transfer mode. Check your screen for any messages about connecting to a computer or device.
On your phone, a notification should pop up. It might say “USB connected” or “Tap for more options.” Tap it to see what your phone detected.
Choose “File Transfer” or “Transfer photos” from the menu. This lets your phone see the camera’s storage. You can now use your phone’s file manager app to browse.
Open the file manager and look for your camera. It might be called by its brand name. Go into the DCIM folder, then into the folder with today’s date or image numbers.
Select the photos you want. Tap and hold on one to start selection, then tap others. Choose “Copy” or “Move,” then pick your phone’s Pictures folder as the destination. That’s how to transfer photos from camera to phone with a cable.
Common Problems and Easy Fixes
Sometimes your phone doesn’t see the camera. Don’t worry, this happens a lot. The first fix is to unplug the cable and plug it back in.
Try a different cable if you have one. Cables can fail even if they look fine. A new cable is a cheap thing to test before you try anything more complex.
Check if your camera needs a driver update. Go to the manufacturer’s website on a computer. Look for firmware updates for your specific camera model.
Your phone might not supply enough power. Some cameras need more juice than a phone can give. Try connecting your phone to a charger while it’s linked to the camera.
Restart both devices. Turn your camera off and on again. Do the same with your phone. This clears up many small software glitches that block connections.
Make sure your camera’s battery isn’t too low. A weak battery can stop data transfer to save power. Charge your camera for a bit and try the transfer again.
Learning how to transfer photos from camera to phone includes solving these hiccups. Every method has its quirks. With practice, you’ll know what to try first when things don’t work.
Choosing the Best Method for You
Think about your typical shooting day. Do you need to send a few shots right after an event? Wireless might be your best bet for quick social media posts.
Do you shoot hundreds of photos at once? A card reader or direct cable will save you time. They handle large batches much faster than wireless ever could.
Consider what gear you already carry. Adding a tiny card reader to your bag is no big deal. But if you hate extra gadgets, using your existing cable makes more sense.
Check your camera’s features. Older models might only have cable options. Newer ones could have Wi-Fi built in, ready to use with a simple app setup.
Your phone type matters too. iPhones need different adapters than Android phones. Make sure any reader or cable you buy matches your phone’s port.
I suggest trying the cable method first since it’s universal. Then explore wireless if your camera supports it. The Consumer FTC site has buying tips for tech accessories.
Knowing how to transfer photos from camera to phone means picking the right tool. Match the method to your needs and gear. You might use different methods on different days.
Keeping Your Photos Organized
After you transfer photos, don’t just dump them anywhere. Create folders on your phone by date or event. “Beach Trip – August” is easier to find than a thousand mixed photos.
Delete the bad shots from your camera after transferring. There’s no need to keep blurry or test pictures. This saves space on both devices for your good work.
Back up your phone photos to a computer or cloud regularly. Your phone can get lost or break. Having another copy protects your memories and your art.
Use album features in your phone’s gallery app. You can make albums for people, places, or projects. This keeps things tidy without moving the actual files around.
Rename files if you want to find specific shots later. “Sunset_over_ocean.jpg” is better than “IMG_4587.jpg.” Do this for your favorite pictures so you can search for them.
The Library of Congress has guides on preserving digital photos. Good habits now mean you can enjoy your pictures for years to come.
Learning how to transfer photos from camera to phone is just the first step. Keeping them organized is the next. A good system makes your photo life much easier.
Safety Tips for Your Gear and Photos
Always turn off your camera before connecting or disconnecting cables. This prevents electrical shorts that could damage the ports. It’s a simple habit that protects your gear.
Handle memory cards with care. Don’t touch the gold contacts with your fingers. Keep them in their protective case when not in your camera or reader.
Use trusted apps for wireless transfers. Download the official app from your camera maker’s website. Avoid third-party apps that might contain malware or steal your photos.
Be careful with public Wi-Fi if using cloud transfers. Your photos could be intercepted on an open network. Wait for a secure, private network if you’re transferring personal shots.
Eject the storage properly from your phone. Don’t just pull the cable or card out. Use the “Eject” or “Safely Remove” option in your phone’s notifications or settings first.
Keep your camera’s firmware updated. Manufacturers fix bugs and improve connectivity with updates. Check for updates every few months to keep things running smooth.
When you learn how to transfer photos from camera to phone, do it safely. Protect your expensive camera and your precious pictures. Good habits prevent data loss and broken equipment.
Frequently Asked Questions
How do I transfer photos from camera to phone without Wi-Fi?
Use a USB cable or a memory card reader. Both methods work without any internet connection. They create a direct link between your devices for moving files.
Why won’t my phone recognize my camera?
Check your cable and connections first. Try a different cable or port. Make sure your camera is turned on and in the correct transfer mode for data sharing.
Can I transfer RAW files from my camera to my phone?
Yes, but your phone might not display them without a special app. The files will transfer, but you may need an app like Adobe Lightroom to open and edit them properly.
How to transfer photos from camera to phone quickly for many pictures?
A memory card reader is usually the fastest method. It’s designed for quick data reads. Transferring hundreds of photos takes just a few minutes with a good reader.
Is there a way to auto-transfer photos from camera to phone?
Some cameras with Wi-Fi can do this with their app. You can set it to send new photos to your phone as you take them. Check your camera’s wireless features menu.
Do I need special software to transfer photos from camera to phone?
Usually not for basic transfers. Your phone’s built-in file manager works. Some camera brands have apps that offer extra features like remote shooting and editing.
Conclusion
So, how to transfer photos from camera to phone? You have several great options now. Start with the cable method since it works with almost any camera and phone.
Related Posts